Recipe: Chicken Curry with Coconut Milk

I have been so utterly busy the last few days but the good news is that packing is almost done. Just a few bits here and there which can be dumped into a bin bag the day we leave…which is this friday 😀 I am not so much sad as excited about the move. New place, new people and making a home out of a house sounds very exciting. All this meant, I could only turn a few pages of my book 😦

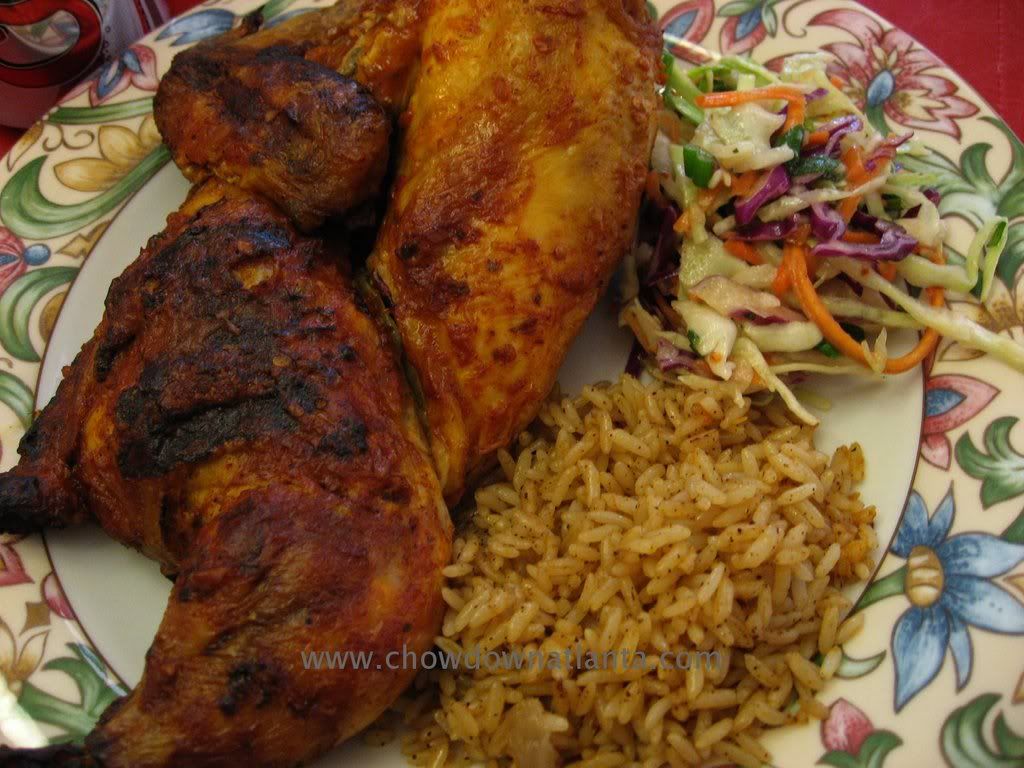
Last sunday, we not only did most of our packing but also managed to prepare Chicken Biriyani and Chicken Curry with Coconut Milk 😀

S is a ‘pro’ when it comes to cooking Chicken Curry with Coconut Milk. It is one of our favourtie dishes. Goes very well with Plain Rice, Biriyani, Pulao Rice or even Chapathis or Parathas.

Ingredients:

  1. Oil – 6-7 Tbsp
  2. Onions (finely chopped) – 3
  3. Tomatoes (finely chopped) – 2
  4. Chicken – 1/2 Kg (Clean thoroughly with turmeric powder and water)
  5. Canned Coconut Milk – 1
  6. Ginger+Garlic Paste – 1 Tbsp
  7. Cloves – 3
  8. Cinnamon Stick – 3 half a inch pieces
  9. Cardamom (Elaichi) – 3 (split open)
  10. Green Chillies – 5 (Split longitudinally)
  11. Curry Leaves – 6
  12. Cumin Seeds – 1 Tsp
  13. Mustard Seeds – 1 Tsp
  14. Turmeric Powder – A pinch
  15. Salt – According to taste
  16. Coriander – To Garnish

Method

Add oil to a pan or a wok and let it heat.

Later add mustard seeds and let them splutter. Now add cumin seeds and fry. Add curry leaves and green chillies and fry.

Now add onions and mix them on medium flame until they turn golden brown in colour. Then add chopped tomatoes and mix well.

Once tomatoes turn soft, add a pinch of turmeric powder and ginger+garlic paste and mix well. Leave on simmer for atleast 5 minutes mixing it in between

Now add chicken pieces and mix well. Leave it on medium flame for atleast 10 mins mixing frequently in between.

Then add coconut milk and mix thoroughly. Close with a lid and leave for 10 mins mixing inbetween.

By now, you will see alot of water retention. Remove lid and let the curry cook on medium flame. (Do not add any water to the dish).

Approx after 20-30 minutes, water oozed out of the meat should have reduced leaving the curry nice and creamy. Garnish with coriander leaves and serve with rice or chapathis

This time, I took some pictures 😀

Njoy!!

Recipe: Chapala Pulusu (Fish Curry)

Let me first start this post with some beautiful roses I got from a special someone 😀

{Click on the roses for larger version}

My Chapala Pulusu (Fish Curry) recipe was long over due. I am a great lover of my mom’s (and aunt’s) fish curry. It’s finger lickin’ good. Till date, I have prepared this dish only twice but it was totally awesome 😀

Back home, we usually prepare fish curry with local find…like Korameenu (not sure what it’s called in english…some say it is the Red Snapper. Any ideas?) and sometimes a Bochha. Since we don’t get any of these in the UK…we had to settle with Salmon.

Recipe Source: Ma

Preparation Time: 30-45 mins

Ingridients:

  1. A Wok
  2. Salmon (or any fish you desire) – 6 medium sized pcs, approx 3-4 inches each (If you are the one who likes to clean their own fish…you can but whole fish too)
  3. Oil – 6-7 Tbsp
  4. Yoghurt – 2 Tbsp
  5. Onions – 3 (finely chopped)
  6. Tomatoes – 2 (finely chopped)
  7. Tamarind Juice – 35 ml (Take lemon sized tamarind ball and immerse it in 35 ml of warm water)
  8. Green Chillies – 4 (Cut longitudinally)
  9. Ginger Garlic Paste – 1 Tsp
  10. Cumin Seeds – 1 Tsp
  11. Mustard Seeds – 1 Tsp
  12. Turmeric Powder- A Pinch
  13. Asafoetida – A Pinch
  14. Chili Powder – 1 Tsp
  15. Salt – According to taste
  16. Curry Leaves – 6-8 Leaves
  17. Coriander Leaves – Handful for Garnishing

Method:

First, wash pieces of fish thoroughly and marinate them for 10 mins in yoghurt, Salt (1 Tsp) and Turmeric Powder (a pinch). Later, wash and drain

Then add pinch of turmeric, chili powder, ginger garlic paste to the pieces and mix well. Leave aside for 20 mins

In the meantime, chop onions, tomatoes and chillies

Add oil into wok and let it heat. Add cumin and mustard seeds. Once mustards start to splutter, add chillies and curry leaves

Now add onions and allows them to turn golden brown in colour and then add asafoetida and mix well

Add tomatoes, turmeric powder, chili powder and mix well

When tomatoes turn soft, add tamarind juice and salt. Make gravy into a thick consistency. Do not dilute it with the tamarind juice. Remember…you are not making sambar 😀

Leave it to boil. Later add your fish pieces and leave on simmer for 10-13 mins.

Garnish with coriander and it’s ready to serve.

I do not have a picture to put up 😦 but it should look like this…

Pic Courtesy of http://www.torchofindia.com/images/

Please note that this is an ‘Andhra Dish’ so could be extremely ‘hot’ for some. Reduce the number of green chillies and it should be fine.

Enjoy!!!!

PS: New pics put up in my photoblog. Do take a look and let me know what you think 🙂 Cheers

Recipe: Banana and Walnut Cake

I spent the morning fighting a bee which refused to leave my territory. The bloody thing. I hate bees. I still remember my friend who was bit by a bee on her cheek and she swell up like a balloon. Nyways, seems like this bee won’t be coming back anytime soon….Muahhahaa (evil laugh) 😀 {Why can’t wordpress have emoticons? Saves me from typing crap!)

Okies..coming to the recipe…here goes..

Banana and Walnut Cake

Preparation Time:  30-45 minutes (Quicker if you’ve baked a cake before)

Cooking Time (in a pre-heated oven at 180 °C): 50 – 60 minutes
Ingredients:

  1. Kitchen Scale (Max upto 2 Kgs)
  2. 3 medium Bananas, ripe if possible (approx. 400 g)
  3. 300 gm Self-Raising Flour
  4. 150 gm soft Butter
  5. 150 gm soft Brown/White sugar (Demerara)
  6. 2 medium Eggs (at room temperature)
  7. 80 gm Walnut Kernels
  8. 2 Tsps Lemon Juice
  9. 2 Tbsps Olive or Vegetable oil
  10. 1 Tbsp Vanilla Essence

Ingredients for Cake Topping/Icing (Optional. I bought a ready-made Icing Sugar tube and decorated the cake. Little effort and saves time too…esp when you are super lazy like me! :D)

  1. 125 gm full fat Soft Cheese
  2. 75 gm Butter
  3. 200 gm Icing Sugar

Kitchen Equipment

  1. 2 large bowls to mix the ingredients
  2. 900gm loaf tin (rectangular, square or circular)
  3. Small amount of greaseproof baking paper
  4. Kitchen Whiskser/Handheld Blender/or just a Fork 🙂

Method

Note: Butter must be soft. The best way to achieve this is to measure out the butter an hour or so before
it is needed and leave it at room temperature. If this is not possible, break up the butter with a fork
and beat it for a minute or so. If all else fails, put it in a bowl and float the bowl in warm water.

  1. Turn the oven on, setting it to 180°C / 350°F / Gas Mark 4.
  2. Next, grease the loaf tin with margarine or butter, and line the tin with greaseproof baking paper.
    It’s not essential to cover 100% of the tin but make sure that it lays as flat as possible on the inside
    of the tin.
  3. Peel the bananas and mash them with a fork until they are really mushy.
  4. Chop up the walnuts reasonably fine.
  5. Place the butter and sugar into a mixing bowl and blend together with a fork. The idea here is to mix the two ingredients thoroughly and at the same time incorporate as much air as possible into the mixture. Mixing with a fork in a figure of eight shape will help to incorporate air into the cake mix.
  6. Now, stir in the bananas and chopped walnut kernels and mix thoroughly.
  7. In a separate bowl, add two eggs and mix with a blender, whisker or a fork until there is a layer of froth formed.
  8. Now sift in the self-raising flour, 2 Tbsps at a time to avoid any bubbles or balls in the mixture and mix thoroughly in a figure of eight.
  9. Now add this mixture to the bowl containing the mixture of butter, sufar and walnut kernels.
  10. Add 2 Tbsps of Olive or Vegetable Oil and 2 Tsps of Lemon Juice and mix thoroughly again in a figure of eight with a fork. The oil and juice will keep the cake moist.
  11. Pour the mixture into the loaf tin, smooth it level and place in the oven for 45-50 minutes.
  12. After that time take it out and test that it is cooked by piercing the cake with a fork and if it comes out clean it’s cooked. If not cook for another 5 minutes and retest.
  13. When you take the cake out of the oven, take it out of the tin and place it on a wire rack or something similar. This will stop the cake sweating and getting damp.
  14. Allow the cake an hour or so to cool down before icing it.

Method for Icing

  1. Make the icing by pouring the icing sugar, soft cheese, butter and vanilla into a bowl and mixing it all together with a fork.
    Spoon the icing onto the cake and spread it evenly with a knife. Pop a couple of cherries or walnuts on the top if you want to decorate it.

Don’t fret looking at the length of the post. This is a very easy recipe. The only time consuming part is the mixing and the baking. You just need to concentrate a little while measuring out the ingredients. Trust me…a home baked cake is much more delicious than the ones you get outside.

Peri Peri Chicken Indian Style at Home. Yummy!

OK…before I start off on this post…let me just say that we went to watch IRON MAN yesterday starring Robert Downey Jr, Gwyneth Paltrow and Jeff Bridges and it was FANTASTICO! Review coming up very soon. SO stay tuned!

Ironmanposter.JPG

OK…coming back to the actual post….did you ever taste a Portugese Dish called Peri-Peri Chicken? Trust me…it’s truly delicious….it’s heavenly!! Our local restaurant Nandos is famous for this and S & I simply love going there. The secret to this dish is the sauce…Nandos Hot Peri-Peri Sauce which is what the chefs at Nandos use to marinate the chicken in before they grill it. S and I always wanted a couple of bottles of the sauce at home and were more than glad when we saw our local supermarket selling them. You can have it with anything…bread, chips, tortillas and even rice 🙂

So one day when we decided to grill chicken at home…S wanted to try out a new recipe. Instead of the regular marination of chicken with youghurt, chili powder etc etc…he wanted to do it with the Nandos sauce 😀 Yes! Our very own Peri Peri Chicken Indian style (that is what I’d like to call it from today) at home…..and all it takes is 10 minutes for preparation with minimal ingredients.

Ingridients:

  1. Nandos Hot Peri-Peri Sauce (there’s also Extra Hot Peri-Peri Sauce if you like your chicken really hot!)
  2. Salt to taste
  3. Tandoori Chicken Powder – 2 Tbsp
  4. Ginger Garlic Paste – 1 Tsp
  5. Chicken Legs or Thighs – 5 (Depends how much an ‘eater’ you are and if you are having any guests over 🙂
  6. Lemon Juice – 2 Tbsp
  7. Lime – 4 (Cut to sprinkle on chicken at the end)

Method:

  • Pre-heat oven at 200 °C for 10-15 mins
  • In the meantime, wash chicken thoroughly in cold water and pierce into it with a knife to make spaces so as to let the ingridients into the pieces
  • Add 8-10 Tbsp Nandos Hot Peri-Peri Sauce, 3 Tbsp Tandoori Chicken Powder, 1 Tsp Ginger Garlic Paste, 2 Tbsp Lemon Juice, Salt to taste and mix well.
  • Marinate for 15 mins

The best thing about this recipe is that you don’t have to marinate the chicken over night or for hours together…15 mins is just fine.

  • and that’s it…place the chicken pieces on an oven grill and place it into the pre-heated owen at 200 °C for 45 mins – 1 hr
  • Garnish with coriander and onions. Cut lime into pieces and leave them on the plate

Picture Courtesy of – http://i165.photobucket.com/albums/u80/AtlFoodie/BoneHeads/Chicken2.jpg

Sorry, no pics of the dish we made…we were done with it before I could take any 😀

Since it is a very simple dish…everyone can try it out! Guys, Girls, Men, Women, Grannies and Grandpas, the lazy ones who don’t want to cook, learners….everyone really….and let me know how it goes 🙂

Njoy!

PS: Just realised that you actually get the Nando’s Sauce in the restaurant itself 😀 And also…once you are done with the dish, you can dip you chicken in the sauce before you savour it…even more YUMMY!! 😀

Potlakaya Talimpu (Snakegourd Tadka)

I have a severe headache but I also want to finish the second half of Harry Potter and the Deathly Hallows. The wierd part is that I haven’t actually read the books published before the final one. I have only watched the movies so I don’t know what happens in the Half Blood Prince. Well anyways, I could never quite understand the wizady, withcy and the magical stuff…They seemed to be so confusing..but the Deathly Hallows is very interesting…and it’s just getting better with every page.

Well anywayz, I quickly logged in to post my first recipe to see if I am any good at it..So here goes.

The recipe for Snakegourd Fry was given to me by my friend Prasuna who is a wonderful cook. I have been bugging her to start her own Food Blog but she is just too lazy 😉 (Sorry Pras).

Potlakaya Talimpu (Boiled Snakegourd Fry)

Preparation Time – 25 Mins

Cuisine – Andhra

Ingridients:

  1. A fully grown Snakegourd
  2. Water
  3. 2 Tbsp Oil
  4. Mustard Seeds
  5. Cumin Seeds
  6. Urad Dal
  7. Chana Dal
  8. Dried Red Chillies
  9. Garlic Flakes
  10. Salt to taste

To Grind into a Mixture-

  1. Urad Dal
  2. Chana Dal
  3. Grated Coconut
  4. Red Chillies
  5. 2 Garlic Flakes

Method –

Peel the Snakegourd and cut it vertically into two halves and then horizontally, cutting it into four pieces. Make sure that you remove the seed before cutting the vegetable. Once the seed has been removed, chop the 4 pieces of Snakegourd into small pieces, approximately the size of a garlic.

Place the chopped Snakegourd in a pressure cooker with water and boil it for approximately 10 mins (2 whistles from the PC).

Swtich off the hob and filter out the water using a vegetable sieve.

In the meantime, add 3 tbsps of oil into a frying pan and add mustard seeds, cumins seeds, urad dal, chana dal and a single garlic flake. Fry in medium flame till they reach golden brown in colour.

Then add the chopped Snakegourd pieces into the frying pan and mix. Make sure that the pan is not covered with a lid. Otherwise, there is chance for the already boiled Snakegourd to become into ‘Mashed Snakegourd’. Keep stirring in between and let it fry on a low flame for atleast 10 mins.

While it fries, you can prepare the powder that needs to be added to the Snakegourd.

For the Powder –

Fry Urad Dal, Chana Dla, dry grated Coconut powder and dried red chillied in 1 tsp oil and transfer them into a Food Processor and grind. Make sure that you add only a teaspoon of oil to fry these ingredients.

After a fine powder has been formed, add a single garlic flake to the powder and grind again.

Let the powder cool for a while and then add salt according to your taste and mix.

Finally, add the powder to the Snakegourd fry that has been put aside and mix.

Leave it on low flame for about 5 mins and switch off.

Potlakaya Talimpu is ready to be served, either with Chapathis or Rice

PS: I am still novice when it comes to food photography…but I am learning and hope to improve very soon… 🙂